|
|
|
|
|
 |
|
|
|
|
|
|
|
|
WW2 Aircraft Carrier Art
Cranston Military Prints  By Subject Naval Art World War Two Ships By Subject Naval Art World War Two Ships  Aircraft Carriers Aircraft Carriers |
[UP] - Aircraft Carriers - Battleships - Cruisers - Submarines - Destroyers - Monitors - Torpedo Boats - Corvettes - Minesweepers - Auxiliaries - Landing Craft |
| World War Two naval art prints of aircraft carriers. |
| Navigation | |
| Page 2 of 3 | Previous .. Page 2 .. Next |
|
|
|
|
|
|
|
|
|
|
|
|
|
|
|
|
|
|
|
|
|
| Navigation | |
| Page 2 of 3 | Previous .. Page 2 .. Next |
| Text for the above items : |
Tokyo Bound by Nicolas Trudgian. On April 18, 1942, under the leadership of Lieutenant Colonel Jimmy Doolittle, a small force of B-25 Mitchell light bombers set forth on one of the most audacious air raids of World War II. Launching in a rough sea from the heaving deck of the carrier USS Hornet, the crews knew that even if they achieved success, they were not to return. Their mission to bomb Tokyo and other industrial targets some 800 miles distant would leave them barely enough fuel to fly on to crash-land in China. Nine aircraft were attacked by enemy fighters, every one made it to the target, all but one aircraft were lost. But the raid was a triumph. The Japanese High Command were so alarmed by the Americans ability to strike at their homeland they attempted to expand the perimeter of activity in the central and southern Pacific - with disastrous results. Lt. Col. Doolittle was awarded the Congressional Medal of Honor in recognition of the extraordinary feat he and his gallant crews performed. Miraculously most survived to fly and fight again later in the war, Jimmy Doolittle going on to command the Eighth Air Force in Europe at the time of the Normandy invasion. |
USS Hornet. Doolittles Raiders by Ivan Berryman. In a 40 knot gale, Lt Col. Doolittles B25 hauls itself into the air. The first of a 16 strong strike force en route to Tokyo. |
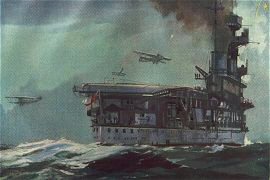
HMS Kelly by Ivan Berryman. The destroyer HMS Kelly passes close to the old carrier HMS Eagle as she escorts a convoy in the Mediterranean early in 1941. |
To Sink the Bismarck by Gerald Coulson. It is 7.15pm on 25th May 1941. The place, North Atlantic. The mission to find and sink the massive German warship Bismarck. The weather was very bad and worsening noticeably with storm force winds, rain squalls and increasingly heavy seas. With seemingly impossible flying conditions, Ark Royal launched its second strike of the day of fifteen swordfish, four each from 810 and 818 squadrons and seven from 820 squadron. Coming under intense fire the pilots came in very low and close and dropped their torpedo on the target. Eventually the Bismarck's fate was sealed by the guns of the Home Fleet. |
Scratch One Flat Top by Stan Stokes. The Douglas TBD Devastator torpedo-bomber was the first low-wing, all metal monoplane to see service with the US Navy. Delivered in 1937 about 100 TBDs were in service when the Japanese attack at Pearl Harbor thrust the United States into WW II. Powered by a 811-HP Pratt and Whitney radial engine, the TBD had a maximum speed of about 200 MPH and a range of about 700 miles. Unfortunately, given the design of the torpedoes used, attacks had to be made at a maximum speed of only about 110 MPH, and at an altitude of no more than 100 feet. This made the Devastator a sitting duck for both enemy fighters or anti-aircraft gunners. The highlight of the TBDs brief battle career in WW II came during the Battle of the Coral Sea in 1942. This battle, the first ever waged solely between the aircraft of opposing carrier attack groups, involved air groups from the USS Yorktown and USS Lexington. Three Japanese carriers, the Shokaku, the Zuikaku, and the Shoho were involved. On May 7 the Lexington launched fifty aircraft and the Yorktown another 43. Two squadrons of TBDs were involved in the attack. This massed force located the Shoho around 11:00 AM. SBD Dauntless dive bombers initiated the attack, and were successful at fending off fighter attacks by Zeros during their near vertical dives. The large force of SBDs put several 1000-pounders into the Shoho. Minutes later the Devastators from the Lexington attacked, gaining advantage from the smoke and confusion created by the dive bombers. Coming in low and slow the Devastators put six or seven torpedoes into the Shoho. In Stan Stokes painting the TBD flown by Lt. R. F. Farrington, T.R. Wiebe, and Walter N. Nelson of VT-2 from the USS Lexington is depicted. Several more hits by the Dauntlesses sealed the fate of the Shoho which slipped under the waves while still making a headway of about 20 knots. Witnessing the Shohos final moments, Lt. Cdr. Bob Dixon reported by radio at 11:36 AM the following message, Scratch One Flat Top! Dixon to carrier. Scratch one Flat Top! This was the first loss of a significant ship by the Imperial Navy. It also foretold of an end of the era of surface war ships slugging it out in a gunnery duel within sight of each other. The era of the carrier battle group had begun, with destruction delivered to a distant enemy by carrier based aircraft. Weeks following the Battle of the Coral Sea, at the Battle of Midway, the United States Navy would destroy almost 50% of Japans carriers in a momentous battle. The Navys TBDs would be virtually wiped-out at Midway, and would be replaced in front-line service by TBF Avengers and SB2C Helldivers for the balance of the War. |
HMS Duke of York by Randall Wilson. HMS Duke of York keeping station on the starboard bow of USS Intrepid, as air defence ship. |
No Room for Error by Philip West. Capt Eric (Winkle) Brown launches his Seafire TM379, from the deck of the trials carrier HMS Pretoria Castle in July 1945. Unlike other carriers, those used for trials, usually had their decks clear of other aircraft. On this day, once the aircraft is launched the carriers crew streamed onto the deck to check the surface and clear anything that may obstruct a landing. TM379, was the first prototype, Seafire Mk 45 and was fitted with a Rotol contra prop, modified fin, rudder and tail hook. |
Off to the Turkey Shoot by Stan Stokes. At the time of the attack of Pearl Harbor the Japanese had superior aircraft and plenty of experienced pilots fresh from combat in China. By 1944 the roles were reversed. Anxious to commence B-29 bombing missions against the Japanese homeland Rear Admiral Marc Mitschers Task Force 58 was given the assignment of supporting the recapture of the Marianas. This proved to be the last major carrier battle of World War II. On June 11, 1944 large formations of Hellcats were dispatched to lure Japanese land-based fighters into combat. Enough Japanese fighters were destroyed to allow the Fifth Fleet to land 140,000 troops on Saipan and Guam on June 15th. Also on June 15th the Japanese main fleet joined up with its mobile fleet about 300-400 miles from Task Force 58. Vice Admiral Ozawa detached a force to use as bait to lure the Americans within range of the main fleet. His bait not taken, on June 19th Ozawa launched three air strikes with about 250 aircraft. The relatively inexperienced Japanese pilots now flying technically inferior aircraft were decimated by the Grumman Hellcats of Task Force 58. By days end Ozawa had lost 218 aircraft, and while unprotected his fleet had been attacked by American submarines resulting in the sinking of two of his carriers. Late in the afternoon of June 20th American Hellcats, Helldivers, and Avengers were launched at Ozawas fleet, resulting in the loss of one more carrier and severe damage to another two. As his airwings returned after dark Admiral Mitscher ordered his fleet to light-up, which enabled many of the American aircraft to return safely. About a third of the planes were forced to ditch with the loss of thirteen crewman. The Grumman F6F-5 Hellcat pictured, became the Navys primary carrier borne fighter plane during World War II. Over 12,000 Hellcats were produced, and the Hellcat was credited with 4,947 of the 6,477 kills of enemy planes downed by carrier pilots during the War. The Hellcat had a top speed of 375 MPH, a range of 1,089 miles and was armed with six machine guns. The aircraft was powered by an 18-cylinder Pratt and Whitney, air-cooled, radial engine which generated 2,000 horsepower. As depicted by Stokes is the aircraft of Squadron Commander David McCampbell of the USS Essex. McCampbell is the highest scoring US Naval aviator of all time. |
Midway: The Turning Point by Stan Stokes. The Battle of Midway in June of 1942 marked the turning point in the War in the Pacific, and the Douglas SBD Dauntless was the aircraft which provided the punch in this decisive victory for America. The SBD, which earned the nickname Slow, But Deadly, entered service with the USN and USMC in 1940. Powered by a 1,000 HP, 9-cylinder, Cyclone radial engine the SBD was capable of a maximum speed of 250 MPH. The Dauntless could stay airborne for a long time with its 1,300 mile range and slow cruising speed, and it was capable of delivering a 1,200 pound bomb load. Because of its slow speed the SBD needed armament to discourage attack by enemy fighters. Two forward firing machine guns and either one or two rear firing guns mounted in the gunners cockpit behind the pilot, gave the SBD enough firepower to make it a challenging target for enemy fighters. The Japanese plan for invading Midway, a strategically-located small island about 1,100 miles northwest of Hawaii, involved the use of a decoy fleet which would feign an invasion of the Aleutians, while the main fleet consisting of approximately 100 ships and four aircraft carriers would carryout the invasion. Based on intelligence reports the US Navy was ready for Adm. Yamamoto this time. The American force totaled 25 ships including the carriers Hornet, Enterprise, and Yorktown. Air power was about even, because the U.S. could count on nearly 100 land-based aircraft on Midway itself. About 1/3rd of the U.S. air power was represented by SBDs. During the first exchanges, American attacks on the Japanese invasion fleet with both land-based and carrier-based aircraft were repulsed with substantial losses. These low-level torpedo attacks focused the attention of both Japanese fighter pilots and AA gunners on the horizon. Lacking effective radar, the Japanese fleet would prove to be unprepared for a high altitude attack by swarms of SBDs on June 4, 1942. The timing proved perfect as the Japanese carriers were laden with fully fueled and armed aircraft being readied for a second wave. As depicted in Stan Stokes dramatic painting the 1,000 pounder of Paul Lefty Holmbergs SBD penetrates the carrier deck of the Soryu while Holmberg pulls out of his dive. Right behind Holmberg is another SBD of VB-3 from the USS Yorktown. SBDs from the Yorktown and its sister ship the Enterprise destroyed three Japanese carriers in a matter of minutes during this battle. While the Yorktown was later lost in the Battle, all four Japanese carriers were eventually destroyed including many of Japans most experienced naval aviators. The rugged and effective Dauntless, the only USN aircraft to remain in service through the entire war, was responsible for destroying more enemy shipping than any other aircraft during WW II. |
HMS Ark Royal by Brian Wood. HMS Ark Royal part of Force H along with the Battleship HMS Renown and Cruiser HMS Sheffield departs Gibraltar to take part in the search for the Bismarck in the Atlantic. During the hunt HMS Ark Royal, Swordfish mistakenly attack the Royal Navy cruiser HMS Sheffiled. Fortunately, the torpedoes were not primed properly and crusier recieived no major damage. Spotter planes from HMS Ark Royal eventually found the Bismarck. and a attack commenced, crippling the Bismarcks rudder. The damage sustained lead to the rest of the Royal Navy surface fleet catching up with the Bismarck and sinking her. HMS ark Royal returns to the mediteranean. later on 13 November 1941: While on her return to Gibraltar in company with the HMS Malaya, HMS Argus, and HMS Hermione supported by Seven destroyers, HMSArk Royal is attacked by the U-81 under the command of Kapitanleutnant Guggenberger in the Mediterranean., and at 1541, a torpedo strikes the starboard side and the ship immediately takes a 10 degree list. within 20 minutes this list has increased to 18 degrees and Captain Maund orders all only essential crew to remain aboard with the rest of the crew to abandon ship. Destroyer HMS Legion under the command of Commander R. S. Jessel comes alongside and takes most of her crew on board, leaving 250 crew and t Captain Maund to try and save the ship but they have to also abndon ship, and just 14 hours after the torpedo strike HMS Ark Royal rolls over and sinks. from the entire crew their was only only one fatality,Able Seaman E. Mitchell was killed. |
HMS Victorious by Ivan Berryman. Completed in May 1941, HMS Victorious had been in commission just nine days when her pilots encountered and attacked the Bismarck. She is seen here in August 1942 with HMS Eagle astern of her. |
Dawn Enterprise by Anthony Saunders The first light of dawn silhouettes the massive outline of the Yorktown class carrier USS Enterprise, in mid April 1944 she was partnered by the new Essex Class carrier USS Lexington. |
Moment of Truth by Keith Woodcock. The print depicts the moment as the first Hurricane of 46 squadron of the Royal Air Force, piloted by Sqn Ldr Kenneth Cross, without arrestor hooks or wires approaches the ill-fated carrier HMS Glorious. during the evacuation of Norway in June 1940. Bing later said We showed them they were wrong. The Fleet Air Arm pilots were delighted saying Marvelous bloody marvelous, now we will get them too. All had landed safely by 4.30am on June 8th. |
USS Baltimore and Saratoga in the Pacific by Anthony Saunders. In February 1944, USS Baltimore and Saratoga make up part of the formidable Task Force 58, forcing their way through the central pacific to attack the Japanese bases in the Marshal Islands in support of Operation Flintlock. |
British Pacific Fleet by Randall Wilson. HMS Howe leads Victorious and Implacable through the Malacca Straits. |
Safe Return by Ivan Berryman. The pilot of a Fairey Swordfish MKII guides his aircraft towards the landing ramp of HMS Victorious following a sortie in the Mediterranean Sea 1940 |
Destination Tokyo by Stan Stokes. On April 18, 1942, Lt. Col. James H. Doolittle led a group of 16 B-25 bombers on a carrier-launched raid on industrial and military targets in Japan. The raid was one of the most daring missions of WW II. Planning for this secret mission began several months earlier, and Jimmy Doolittle, one of the most outstanding pilots and leaders in the United States Army Air Corps was chosen to plan, organize and lead the raid. The plan was to get within 300 or 400 miles of Japan, attack military and industrial targets in Tokyo, Osaka, and Kobe shortly after nightfall, and then fly on to a dawn landing at secret airfields on the coast of China. The twin engine B-25 Mitchell bomber was selected by Doolittle for the mission and practice indicated that it should be possible to launch these aircraft from a carrier deck with less than 500 feet of runway. On April 2, 1942 the USS Hornet and a number of escorts set sail from Alameda, California with the 16 B-25s strapped to its deck. This task force rendezvoused with another including the USS Enterprise, and proceeded for the Japanese mainland. An element of surprise was important for this mission to succeed. When the task force was spotted by a Japanese picket boat, Admiral Halsey made the decision to launch the attack earlier than was planned. This meant that the raiders would have to fly more than 600 miles to Japan, and would arrive over their targets in daylight. It also meant that it would be unlikely that each aircraft would have sufficient fuel to reach useable airfields in China. Doolittle had 50 gallons of additional fuel stowed on each aircraft as well as a dinghy and survival supplies for the likely ditchings at sea which would now take place. At approximately 8:00 AM the Hornets loudspeaker blared, Now hear this: Army pilots, man your planes! Doolittle and his co-pilot R.E. Cole piloted the first B-25 off the Hornets deck at about 8:20 AM. With full flaps, and full throttle the Mitchell roared towards the Hornets bow, just barely missing the ships island superstructure. The B-25 lifted off, Doolittle leveled out, and made a single low altitude pass down the painted center line on the Hornets deck to align his compass. The remaining aircraft lifted off at approximately five minute intervals. The mission was planned to include five three-plane sections directed at various targets. However, Doolittle had made it clear that each aircraft was on its own. He insisted, however, that civilian targets be avoided, and under no circumstances was the Imperial Palace in Tokyo to be bombed. About 30 minutes after taking off Doolittles B-25 was joined by another piloted by Lt. Travis Hoover. These two aircraft approached Tokyo from the north. They encountered a number of Japanese fighter or trainer aircraft, but they remained generally undetected at their low altitude. At 1:30 PM the Japanese homeland came under attack for the first time in the War. From low altitudes the raiders put their cargoes of four 500 pounders into a number of key targets. Despite antiaircraft fire, all the attacking aircraft were unscathed. The mission had been a surprise, but the most hazardous portion of the mission lay ahead. The Chinese were not prepared for the raiders arrival. Many of the aircraft were ditched along the coast, and the crews of other aircraft, including Doolittles were forced to bail out in darkness. There were a number of casualties, and several of the raiders were caught by Japanese troops in China, and some were eventually executed. This painting is dedicated to the memories of those airmen who made the ultimate sacrifice for their country and the thousands of innocent Chinese citizens which were brutally slaughtered as a reprisal for their assistance in rescuing the downed crews. |
HMS Indefatigable by Randall Wilson. British Fleet Carrier HMS Indefatigable while serving with the Pacific Fleet comes under attack by kamikaze aircraft which scored one hit causing only superficial damage. |
HMS Anson at Sydney Harbour, July 1945 by Ivan Berryman. The King George V class battleship HMS Anson is pictured in Sydney Harbour where she joined the Pacific Fleet in July 1945, viewed across the flight deck of HMS Vengeance, where ten of her Vought F4.U Corsairs are ranged in front of a single folded Fairey Barracuda |
HMS Hermes by Frank Mason. No text for this item |
Spitfires - Malta Bound by Philip West. On the 11th August 1942, Flight Lieutenant Geoffrey Wellum DFC, having just taken off from the deck of HMS Furious, leads his section of gathering Spitfires on the long journey to Malta. They are much-needed reinforcements for the beleaguered island, now in the twenty-sixth month of its siege. To enable each of the 38 Spitfires dispatched from Furious to reach Malta, over three hours flying time away, they carry maximum fuel together with a centre-line over-load tank. Even their ammunition is removed to save weight. Escorting Furious to her aft is the Cruiser HMS Manchester together with Destroyers Brave and Lithe. To their port side is the Ohio tanker laden with fuel during what became an epic voyage. In the distance HMS Eagle succumbs to an Axis torpedo attack. The success of Operation Pedestal was absolutely critical for the survival of Malta, bringing desperately needed fuel, food and ammunition to the Island. Losses were heavy but the courage and determination by all involved prevailed: five of the fourteen merchant ships, including the Ohio, made it through and the island was saved. |
| Navigation | |
| Page 2 of 3 | Previous .. Page 2 .. Next |
|
Contact Details |
|
Sign Up To Our Newsletter!
This website is owned by Cranston Fine Arts. Torwood House, Torwoodhill Road, Rhu, Helensburgh, Scotland, G848LE Contact: Tel: (+44) (0) 1436 820269. Email: cranstonorders -at- outlook.com
|
|
|